Integration with ActiveCampaign Follow
In any Easypromos promotion with a registration form, you can obtain the emails of the users, and this data can be downloaded as an Excel file. But if you have a White Label or a Corporate account and you use ActiveCampaign, it's now even easier; You can synchronize your promotions with your ActiveCampaign account and import the users that have signed up in the promotions to an ActiveCampaign lead list.
Which actions are possible?
1. Automatically synchronize and import the participants’ email addresses to any of your Active Campaign lists. Easypromos synchronizes the leads with ActiveCampaign every 15 minutes.
2. Link the registration form fields of the promotion with the fields of the ActiveCampaign list.
3. Condition the import to the ActiveCampaign list to a checkbox in the registration form (for example the checkbox where you ask for consent to include the users in your newsletter mailing list).
Note: The ActiveCampaign Integration is only available for clients with a White Label or Corporate plan.
Important: To be able to import the participants’ email addresses to your ActiveCampaign email lists, you need to activate the ‘Email’ field in the registration form so that the users have to fill in their email addresses when registering in the promotion.
Note: The integration will only import new users that register in the promotion so be sure to set up the integration before you launch it.
To get started, the administrator has to have an ActiveCampaign account as well as a leads list where the emails of the users that have participated in the promotion will be imported to.
Once the email list is created, follow these steps to synchronize the database of the promotion with ActiveCampaign:
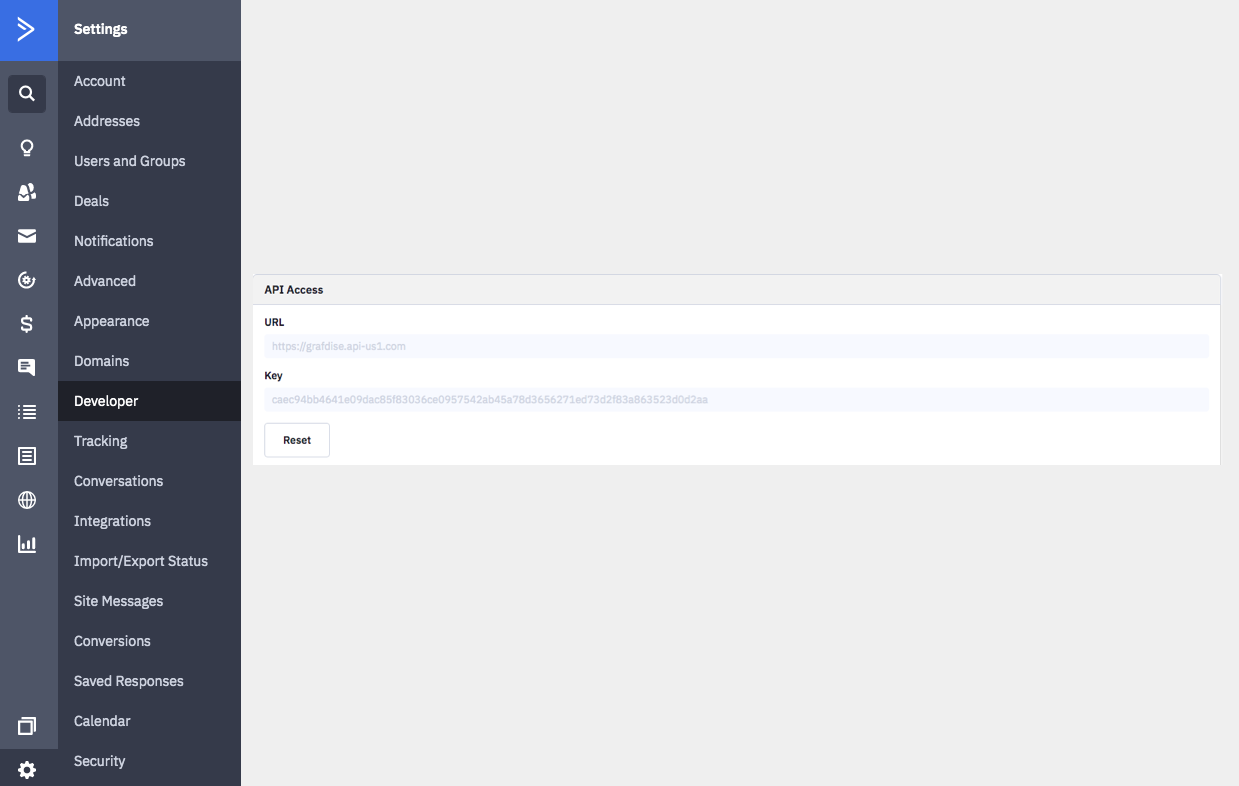
1. First you need to create a new API in ActiveCampaign to get the API access data that you need to set up the integration. To do so, in your ActiveCampaign account, go to the 'Account settings' in your account, to the Developers section, and create a new key:

2. When you have the data of the ActiveCampaign API, go to the 'Integrations' section in the promotion. You will find it in the menu on the left side of the main management page of the promotion:
3. Next, click on the Active Campaign icon to set up the integration:
4. You will now access the setup of the ActiveCampaign integration, where the first step is to connect with your ActiveCampaign account by entering the API key and the URL.
5. Now, a pop-up will open with the different email lists that you have created in ActiveCampaign. Select the ActiveCampaign list where you want to import the data of the users in your promotion.
6. Next, a new pop-up will open up and show you the different fields that you have set up in the registration form of the promotion, as well as the email field which is there by default. At this point, you have to link the different registration form fields with the fields of the ActiveCampaign list:
7. When the fields are linked, the automatic import will be enabled and the app will automatically synchronize and import the leads to ActiveCampaign as they register in the promotion (the users will be imported automatically every 15 minutes).
On this screen, you can see the available setup options of the integration:
- Change: Here you can change the ActiveCampaign email list that you’ve selected previously.
- View and edit matched fields: Here you can review the fields of the form that you’ve linked with the fields of the ActiveCampaign list, and modify if necessary.
- Select the consent checkbox from the promotion: This option allows you to select the checkbox of the registration form where you ask for the users’ consent to sending email marketing/newsletters. If you select this option, the application will only import the users that have checked this checkbox to ActiveCampaign.
Note: In promotions with the login system activated, the system will only export the unique registered users and not their participations nor prizes.

Comments
0 comments
Please sign in to leave a comment.