
Tutorial: Frequent options for sending emails Follow

This article explains how to set up automated emails for a range of purposes, step by step. Check this list of common email purposes, including promotion management, reminders, and prize management, to find your guide.
Note: This tutorial only applies to the CLASSIC Easypromos promotions, which are the following: Entry form giveaway in 1 step, Photo contest, Writing contest, Video contest, Scenes, PhotoFun, Hashtag+Entry form, Refer a friend, Personality quiz and Product Recommender.
For the rest of the applications, check the Emails and Notifications Platform 2.0 tutorial.
Promotion management:
-
Validate participants' email addresses
-
Thank participants for participating
-
Inform participants their entry has been accepted and published
-
Inform participants their entry has been rejected
-
Send participants a summary of their quiz answers
-
Send participants their personalized message after completing the Personality Quiz
-
Email participants based on survey results
-
Email participants based on age, gender, country, or other entry form fields
-
Thank participants for participating in the promotion
-
How to send an email with the photo that each user has customized with the PhotoFun tool
-
Send an email to users to inform them that they have reached the minimum number of Recruits
Reminders:
-
Remind participants to validate their email
-
Remind participants to refer and recruit friends
-
Remind participants to get votes for their competition entries
-
Remind participants of when the promotion ends
Prizes, coupons and promotional codes:
-
Contact giveaway winners
-
Send a coupon to all registered participants
-
Send a promotional code to all registered participants
-
Send a promotional code to users who verify their email address
-
Send a coupon to participants who refer and recruit friends
-
Send a coupon to participants with high quiz scores
Other emails:
Note: Learn how the Email Platform works in general by reading this tutorial.
Promotion management
1. Validate participants' email addresses
To set up this type of email, read this specially prepared tutorial.
2. Thank participants for participating
1. Create a new email, and choose a clearly identifiable title.
2. Choose the “On participating” email type.
3. Select the filter option, “All participants.”
4. In the "From name" field, write the name of the sender that participants will see when receiving the email. Optionally, in the "Reply to" field you can type the sender's address, in case you want the users to be able to respond to the email.
Note: If you don't set up the sender's address, by default the email address will be no-reply@easypromosapp.com (for Basic and Premium promotions) and no-reply@cstmapp.com (for White Label promotions).
5. Write the email with the message you wish to transmit to the participant. Use “smart tags” to customize the email.
6. By default, sending is activated as soon as the email is created. If you don’t wish for it to be activated yet, uncheck “Activate sending of this type of email.”
7. Click on "create" to generate the email.
8. Review the general options to configure the email signature, as well as the header and footer images.
9. If you’d like to see how the email will look, as well as making sure that it’s active and ready to function, you can carry out a test.
3. Inform participants their entry has been accepted and published
1. Create a new email and add a title that will enable you to identify it.
2. Choose the “On accept entry” email type.
3. Select “All participants” as recipients.
4. In the "From name" field, write the name of the sender that participants will see when receiving the email. Optionally, in the "Reply to" field you can type the sender's address, in case you want the users to be able to respond to the email.
Note: If you don't set up the sender's address, by default the email address will be no-reply@easypromosapp.com (for Basic and Premium promotions) and no-reply@cstmapp.com (for White Label promotions).
5. Write the email, informing recipients that their entry has been accepted and published. Use “smart tags” to indicate them the entry URL where they will find their entry.
7. By default, sending is activated as soon as the email is created. If you don't wish for it to be activated yet, uncheck “Activate sending of this type of email.”
8. Click on “create” to generate the email.
9. Review the general options to configure the signature of the email, as well as the header and footer images.
10. If you'd like to see how the email will look, as well as making sure that it’s active and ready to function, you can carry out a test.
4. Inform participants their entry has been rejected
1. Create a new email and add a title that will enable you to identify it.
2. Choose the “On reject entry” email type.
3. Select “All participants” as recipients.
4. In the "From name" field, write the name of the sender that participants will see when receiving the email. Optionally, in the "Reply to" field you can type the sender's address, in case you want the users to be able to respond to the email.
Note: If you don't set up the sender's address, by default the email address will be no-reply@easypromosapp.com (for Basic and Premium promotions) and no-reply@cstmapp.com (for White Label promotions).
5. Write the email, informing recipients that their entry has been rejected and it won't be published.
7. By default, sending is activated as soon as the email is created. If you don’t wish for it to be activated yet, uncheck “Activate sending of this type of email.”
8. Click on “create” to generate the email.
9. Review the general options to configure the signature of the email, as well as the header and footer images.
10. If you’d like to see how the email will look, as well as making sure that it’s active and ready to function, you can carry out a test.
5. Send participants a summary of their quiz answers
If you have created a betting-pool or a quiz, where users must answer the questions of a questionnaire, you can schedule the sending of an email so that each participant has a summary of their answers in the questionnaire. In this way, the user will always have on hand to check their answers in the betting-pool or quiz. To set up this email, follow the steps below:
Note: In order to send the summary of the answers in the questionnaire, you must enable the summary page in the questionnaire. More information.
1. Create a new email and add a title that will enable you to identify it.
2. Choose the email type entitled "On participating” and add the day and time at which you wish to send it.
3. Select the filter option, “All participants.”
4. In the "From name" field, write the name of the sender that participants will see when receiving the email. Optionally, in the "Reply to" field you can type the sender's address, in case you want the users to be able to respond to the email.
Note: If you don't set up the sender's address, by default the email address will be no-reply@easypromosapp.com (for Basic and Premium promotions) and no-reply@cstmapp.com (for White Label promotions).
5. Write an email with the message you wish to transmit to the participant. Use “smart tags” to customize the email. In this case, you must use the smart tag "Quiz summary page" so that the email shows the answers of each participant in the questionnaire.
6. By default, sending is activated as soon as the email is created. If you don’t wish for it to be activated yet, uncheck “Activate sending of this type of email.”
7. Click on "create" to generate the email.
8. Review the general options to configure the email signature, as well as the header and footer images.
9. If you’d like to see how the email will look, as well as making sure that it’s active and ready to function, you can carry out a test.
6. Send participants their personalized message after completing the Personality Quiz
If you have created a Personality Quiz with personalized final messages, below we will explain how you can send each participant their personalized message. For this, you must create as many emails as the final messages our Personality Test has.
To do this, you must follow these steps:
1. Create a new email and add a title that will enable you to identify it.
2. Choose the “On participating” email type.
3. Select the filter option Quiz results> Result is 1. In this way, we will first prepare the email that will be sent to users whose personalized message has been the final message with value "1".
4. In the "From name" field, write the name of the sender that participants will see when receiving the email. Optionally, in the "Reply to" field you can type the sender's address, in case you want the users to be able to respond to the email.
Note: If you don't set up the sender's address, by default the email address will be no-reply@easypromosapp.com (for Basic and Premium promotions) and no-reply@cstmapp.com (for White Label promotions).
5. Write an email with the message you wish to send to the participant. Here the key will be to recover the text of the personalized message in question, which you can retrieve from the Editor > Pages > Quiz > Final messages section. Use “smart tags” to customize the email.
6. By default, sending is activated as soon as the email is created. If you don’t wish for it to be activated yet, uncheck “Activate sending of this type of email.”
7. Click on "create" to generate the email.
8. Review the general options to configure the email signature, as well as the header and footer images.
9. If you’d like to see how the email will look, as well as making sure that it’s active and ready to function, you can carry out a test.
Repeat these same steps to create the email for each personalized message. In Step 3 you must make sure that the filter "Quiz results" has the value of the corresponding final message configured.
7. Email participants based on survey results
1. Create a new email and add a title that will enable you to identify it.
2. Choose the “On participating” email type. You can also select "On a scheduled date” or “Manual” if you are not yet sure when you want to send it.
3. Filter recipients by “Quiz results.”
4. Choose the value that you want from the results messages you have preset in the “Quiz” section. Add the filter by clicking on the green button.
5. In the "From name" field, write the name of the sender that participants will see when receiving the email. Optionally, in the "Reply to" field you can type the sender's address, in case you want the users to be able to respond to the email.
Note: If you don't set up the sender's address, by default the email address will be no-reply@easypromosapp.com (for Basic and Premium promotions) and no-reply@cstmapp.com (for White Label promotions).
6. Write the email, including the specific content that you wish to provide to the recipients, and customize it with "smart tags".
7. By default, sending is activated as soon as the email is created. If you don’t wish for it to be activated yet, uncheck “Activate sending of this type of email.”
8. Click on "create" to generate the email.
9. Review the general options to configure the signature of the email, as well as the header and footer images.
10. If you’d like to see how the email will look, as well as making sure that it’s active and ready to function, you can carry out a test.
8. Email participants based on age, gender, country, or other entry form fields
If you’d like to send an email filtered by a characteristic that you’ve configured in the entry form, you should make sure that this is selected and/or created in the “Edit” menu. If it is activated it will appear as a filter in the Emails Platform. Bear in mind that there are three types of data that you can ask for in the form:
- Predefined fields (email, city, country, date of birth, gender and telephone.)
- Additional customizable fields (you can add them in Premium and White Label. They can be text fields or dropdown menus.)
- Verification fields (add these so that users can check a specific box in order to give their consent.)
Example 1. Send a different email to male and female participants. Predefined field activated.
1. Create a new email, adding a title that will enable you to identify it.
2. Choose the “On participating” email type. You can also choose “Manual” or “At a scheduled date” if you want to send it later.
3. Filter the recipients by “Gender.”
4. Choose “Male” or “Female” as the condition and add the filter with the green button.
5. In the "From name" field, write the name of the sender that participants will see when receiving the email. Optionally, in the "Reply to" field you can type the sender's address, in case you want the users to be able to respond to the email.
Note: If you don't set up the sender's address, by default the email address will be no-reply@easypromosapp.com (for Basic and Premium promotions) and no-reply@cstmapp.com (for White Label promotions).
6. Write the email with the message that you wish you give the user. Use "smart tags" to customize the email.
7. By default, sending is activated as soon as the email is created. If you don’t wish for it to be activated yet, uncheck “Activate sending of this type of email.”
8. Click on "create" to generate the email.
9. Review the general options to configure the signature of the email, as well as the header and footer images.
10. If you’d like to see how the email will look, as well as making sure that it’s active and ready to function, you can carry out a test.
Example 2. Send an email that is differentiated according to the region in which the participants reside. Country field used.
1. Create a new email and add a title that will enable you to identify it.
2. Choose the “On participating” email type. You can also choose “Manual” or “On a scheduled date” if you want to send it later.
3. Filter the recipients by using the additional field entitled “Country”.
4. Make "Equal to” your condition and enter the name of the Country of your preference. Use the green button to apply the filter.
5. In the "From name" field, write the name of the sender that participants will see when receiving the email. Optionally, in the "Reply to" field you can type the sender's address, in case you want the users to be able to respond to the email.
Note: If you don't set up the sender's address, by default the email address will be no-reply@easypromosapp.com (for Basic and Premium promotions) and no-reply@cstmapp.com (for White Label promotions).
6. Write an email with the message that you wish to send the participant. Use “smart tags” to customize the email.
7. By default, sending is activated as soon as the email is created. If you don’t wish for it to be activated yet, uncheck “Activate sending of this type of email.”
8. Click on "create" to generate the email.
9. Review the general options to configure the signature of the email, as well as the header and footer images.
10. If you’d like to see how the email will look, as well as making sure that it’s active and ready to function, you can carry out a test.
Example 3. Send emails to those who have checked the box indicating that they would like to receive the informative newsletter. Verification field created.
1. Create a new email and add a title that will enable you to identify it.
2. Choose the “On participating” email type. You can also choose the “Manual” mode or “On a scheduled date” if you wish to send it later.
3. Filter recipients by the verification box created. In this case, “commercial emails”.
4. Choose “Yes” as the condition and use the green button to generate the filter.
5. In the "From name" field, write the name of the sender that participants will see when receiving the email. Optionally, in the "Reply to" field you can type the sender's address, in case you want the users to be able to respond to the email.
Note: If you don't set up the sender's address, by default the email address will be no-reply@easypromosapp.com (for Basic and Premium promotions) and no-reply@cstmapp.com (for White Label promotions).
6. Write an email with the message that you wish to transmit to the participant. Use “smart tags” to customize the email.
7. By default, sending is activated as soon as the email is created. If you don’t wish for it to be activated yet, uncheck “Activate sending of this type of email.”
8. Click on "create" to generate the email.
9. Review the general options to configure the email signature, as well as the header and footer images.
10. If you’d like to see how the email will look, as well as making sure that it’s active and ready to function, you can carry out a test.
9. Thank participants for participating in the promotion
1. Create a new email and add a title that will enable you to identify it.
2. Choose the “Manual” email type or “On a scheduled date”, depending on when you’d like to send it.
3. Select the filter option, “All participants.”
4. In the "From name" field, write the name of the sender that participants will see when receiving the email. Optionally, in the "Reply to" field you can type the sender's address, in case you want the users to be able to respond to the email.
Note: If you don't set up the sender's address, by default the email address will be no-reply@easypromosapp.com (for Basic and Premium promotions) and no-reply@cstmapp.com (for White Label promotions).
5. Write the email with the message you wish to transmit to the participant. Use “smart tags” to customize the email.
6. By default, sending is activated as soon as the email is created. If you don’t wish for it to be activated yet, uncheck “Activate sending of this type of email.”
7. Click on "Create" to generate the email.
8. Review the general options to configure the email signature, as well as the header and footer images.
9. If you’d like to see how the email will look, as well as making sure that it’s active and ready to function, you can carry out a test.
10. How to send an email with the photo that each user has customized with the PhotoFun tool
If your Photo Contest has the PhotoFun tool enabled, which allows users to personalize the photo that they upload to the contest with frames and stickers, you can create an email so that each participant receives the photo that they have customized.
To configure this email, follow the steps indicated below:
1. Create a new email and add a title that will enable you to identify it.
2.Choose the “On participating” email type.
3. Select the filter option “All participants.”
4. In the "From name" field, write the name of the sender that participants will see when receiving the email. Optionally, in the "Reply to" field you can type the sender's address, in case you want the users to be able to respond to the email.
Note: If you don't set up the sender's address, by default the email address will be no-reply@easypromosapp.com (for Basic and Premium promotions) and no-reply@cstmapp.com (for White Label promotions).
5. Write the email with the message you wish to transmit to the participant. Use “smart tags” to customize the email. In this case, you must use the smart tag "User picture" so that the email includes the photo that the user has personalized with frames and stickers.
6. By default, sending is activated as soon as the email is created. If you don’t wish for it to be activated yet, uncheck “Activate sending of this type of email.”
7. Click on "Create" to generate the email.
8. Review the general options to configure the email signature, as well as the header and footer images.
9. If you’d like to see how the email will look, as well as making sure that it’s active and ready to function, you can carry out a test.
11. Send an email to users to inform them that they have reached the minimum number of Recruits
1. In "Description" add a text to identify this emailing.
2. Create a new email and choose the email type. It could be "By specific date" or "Manual" depending on your preference. You can also send it to a participant when they reach a minimum of recruits. This can be done via the "On recruiting a new user" option.
3. Select as recipients "Number of users recruited"> Equal or greater than> and here specify the minimum value of recruits they should get. For example, "5". Add the filter with the green button.
4. In the "From name" field, write the name of the sender that participants will see when receiving the email. Optionally, in the "Reply to" field you can type the sender's address, in case you want the users to be able to respond to the email.
Note: If you don't set up the sender's address, by default the email address will be no-reply@easypromosapp.com (for Basic and Premium promotions) and no-reply@cstmapp.com (for White Label promotions).
5. Write an email informing the recipient that he has reached the goal of the promotion. Utilize the "smart tags" to customize the email.
6. Click on "add" to generate the email.
7. Review the general options to configure the signature of the email, along with the header and footer images.
8. If you’d like to see how the email will look, as well as making sure that it’s active and ready to function, you can carry out a test.
Reminders
1. Remind participants to validate their email
1. Create a new email and add a title that will enable you to identify it.
2. Choose the "Manual" type of email to activate it whenever you like. You can also choose “On a scheduled date” email type and configure the date and time.
3. Filter recipients by “Validated email."
4. Choose the condition, “No”. This way the recipients will be users with no validated email. Add this filter with the green button.
5. In the "From name" field, write the name of the sender that participants will see when receiving the email. Optionally, in the "Reply to" field you can type the sender's address, in case you want the users to be able to respond to the email.
Note: If you don't set up the sender's address, by default the email address will be no-reply@easypromosapp.com (for Basic and Premium promotions) and no-reply@cstmapp.com (for White Label promotions).
6. Write an email informing non validated participants remembering them that this step is missing to enter to the draw. Add the smart tag "Email Validation Link", which will be {{validate_email}}, to provide them with the link via which they can be validated.
7. By default, sending is activated as soon as the email is created. If you don’t wish for it to be activated yet, uncheck “Activate sending of this type of email.”
8. Click on "create" to generate the email.
9. Review the general options to configure the signature of the email, as well as the header and footer images.
10. If you’d like to see how the email will look, as well as making sure that it’s active and ready to function, you can carry out a test.
2. Remind participants to refer and recruit friends
1. Create a new email and add a title that will enable you to identify it.
2. Choose the “On a scheduled date” email type and configure the date and time. If you haven’t yet decided when it should be sent, you can create it with “Manual” and activate it whenever you like.
3. Filter recipients by “Number of recruited users."
4. Choose the condition, “Less than.” Signal the value and add this filter with the green button.
5. In the "From name" field, write the name of the sender that participants will see when receiving the email. Optionally, in the "Reply to" field you can type the sender's address, in case you want the users to be able to respond to the email.
Note: If you don't set up the sender's address, by default the email address will be no-reply@easypromosapp.com (for Basic and Premium promotions) and no-reply@cstmapp.com (for White Label promotions).
6. Write an email informing participants how many users they have recruited. Add the smart tag "Recruiting URL" {{user_recruiting_url}} and/or "Buttons to recruit" {{share_recruiting_url}} to provide them with the link via which they can continue recruiting. You can also use the smart tag "Current number of recruits" {{current_recruits}} to inform participants of their current number of friends recruited.
7. By default, sending is activated as soon as the email is created. If you don’t wish for it to be activated yet, uncheck “Activate sending of this type of email.”
8. Click on "create" to generate the email.
9. Review the general options to configure the signature of the email, as well as the header and footer images.
10. If you’d like to see how the email will look, as well as making sure that it’s active and ready to function, you can carry out a test.
Note: in this example the email will be sent to all participants who have recruited less than 1 friend.
3. Remind participants to get votes for their competition entries
1. Create a new email and add a title that will enable you to identify it.
2. Choose the “On a scheduled date” email type and configure the date and time. If you haven’t yet decided when it should be sent, you can create it with “Manual” and activate it whenever you like.
3. Filter recipients by "Number of votes".
4. Choose the condition, “less than.” Signal the value and add this filter with the green button.
5. In the "From name" field, write the name of the sender that participants will see when receiving the email. Optionally, in the "Reply to" field you can type the sender's address, in case you want the users to be able to respond to the email.
Note: If you don't set up the sender's address, by default the email address will be no-reply@easypromosapp.com (for Basic and Premium promotions) and no-reply@cstmapp.com (for White Label promotions).
6. Write an email informing the participant how many votes he or she has by using the smart tag "Current votes" {{current_votes}} to inform participant of the number of votes they have at the moment, as well as the smart tag "My entry URL" {{user_voteme_url}} and/or the smart tag "Buttons to share my entry" {{share_voteme_url}} to help them to continue asking for votes.
7. By default, sending is activated as soon as the email is created. If you don’t wish for it to be activated yet, uncheck “Activate sending of this type of email.”
8. Click on "create" to generate the email.
9. Review the general options to configure the signature of the email, as well as the header and footer images.
10. If you’d like to see how the email will look, as well as making sure that it’s active and ready to function, you can carry out a test.
4. Remind participants of when the promotion ends
1. Create a new email and add a title that will enable you to identify it.
2. Choose the email type entitled "On a scheduled date” and add the day and time at which you wish to send it.
3. Select the filter option, “All participants.”
4. In the "From name" field, write the name of the sender that participants will see when receiving the email. Optionally, in the "Reply to" field you can type the sender's address, in case you want the users to be able to respond to the email.
Note: If you don't set up the sender's address, by default the email address will be no-reply@easypromosapp.com (for Basic and Premium promotions) and no-reply@cstmapp.com (for White Label promotions).
5. Write an email with the message you wish to transmit to the participant. Use “smart tags” to customize the email.
6. By default, sending is activated as soon as the email is created. If you don’t wish for it to be activated yet, uncheck “Activate sending of this type of email.”
7. Click on "create" to generate the email.
8. Review the general options to configure the email signature, as well as the header and footer images.
9. If you’d like to see how the email will look, as well as making sure that it’s active and ready to function, you can carry out a test.
Prizes, coupons, and promotional codes
1. Contact giveaway winners
1. Create a new email and give it a title that will enable you to identify it.
2. Choose the “Manual” email type. You could also select “On a scheduled date” if you know when the sweepstake will be carried out and the email should be sent.
3. On "Recipients" apply the filter "Prizes" and on "Values for conditions" choose which winners you wish to email according to the prize awarded and add this filter with the green button.
4. In the "From name" field, write the name of the sender that participants will see when receiving the email. Optionally, in the "Reply to" field you can type the sender's address, in case you want the users to be able to respond to the email.
Note: If you don't set up the sender's address, by default the email address will be no-reply@easypromosapp.com (for Basic and Premium promotions) and no-reply@cstmapp.com (for White Label promotions).
5. Write the email to inform participants about their prize and how to claim it. Use the smart tags "Prize" {{prize_summary}} to inform about their prize.
6. By default, sending is activated as soon as the email is created. If you don’t wish for it to be activated yet, uncheck “Activate sending of this type of email.”
7. Click on "create" to generate the email.
8. Review the general options to configure the signature of the email, as well as the header and footer images.
9. Carry out a test to see how the email will look when sent. When you are ready to send it, do so by clicking on “confirm and send.”
2. Contact Instant Win winners
1. Create a new email and add a title that will enable you to identify it.
2. Choose the “On participating” email type. You can also decide to send it later with the “Manual” or “On a scheduled date” options.
3. On "Recipients" apply the filter "Prizes" and on "Values for conditions" choose which winners you wish to email according to the prize awarded and add this filter with the green button.
4. In the "From name" field, write the name of the sender that participants will see when receiving the email. Optionally, in the "Reply to" field you can type the sender's address, in case you want the users to be able to respond to the email.
Note: If you don't set up the sender's address, by default the email address will be no-reply@easypromosapp.com (for Basic and Premium promotions) and no-reply@cstmapp.com (for White Label promotions).
5. Write an email to inform the participant of their prize and the conditions for its retrieval. Use the smart tags "Prize" {{prize_summary}} to inform winners about their prize.
6. By default, sending is activated as soon as the email is created. If you don’t wish for it to be activated yet, uncheck “Activate sending of this type of email.”
7. Click on "Create" to generate the email.
8. Review general options to configure the signature of the email, as well as the header and footer images.
9. If you’d like to see how the email will look, as well as making sure that it’s active and ready to function, you can carry out a test.
3. Send a coupon to all registered participants
1. Create a new email and give it a title that will enable you to identify it.
2. Choose the "On participating" email type.
3. Select the filter entitled "All participants". This filter will be added to Recipients.
4. In the "From name" field, write the name of the sender that participants will see when receiving the email. Optionally, in the "Reply to" field you can type the sender's address, in case you want the users to be able to respond to the email.
Note: If you don't set up the sender's address, by default the email address will be no-reply@easypromosapp.com (for Basic and Premium promotions) and no-reply@cstmapp.com (for White Label promotions).
5. Complete the "Subject" and "Body" of the email. Use smart tags to customize it.
6. Add the coupon as an attachment.
7. By default, sending is activated as soon as the email is created. If you don’t wish for it to be activated yet, uncheck "Activate sending of this type of email".
8. Click on "create" to generate the email.
9. Review general options for setting up the email signature plus header and footer images.
10. If you’d like to see how the email will look, as well as making sure that it’s active and ready to function, you can carry out a test.
4. Send a promotional code to all registered participants
1. Create a new email and add a title that will enable you to identify it.
2. Choose the "On participating" email type.
3. Select "All participants" as recipients.
4. In the "From name" field, write the name of the sender that participants will see when receiving the email. Optionally, in the "Reply to" field you can type the sender's address, in case you want the users to be able to respond to the email.
Note: If you don't set up the sender's address, by default the email address will be no-reply@easypromosapp.com (for Basic and Premium promotions) and no-reply@cstmapp.com (for White Label promotions).
5. Write the email to inform participants that you are sending the promotional code that can be redeemed. Use the smart tag "Promotional code" {{user_promotional_code}} to show the promotional code. You can also use the smart tag "Prize" {{prize-summary}} which will be translated into a small block of text that will include the name of the prize, as well as the promotional code assigned to each participant.
6. Attach the instruction or any other document you wish to send.
7. By default, sending is activated as soon as the email is created. If you don’t wish for it to be activated yet, uncheck "Activate sending of this type of email".
8. Click on "Create" to generate the email.
9. Review the general options to configure the signature of the email, as well as the header and footer images.
10. If you’d like to see how the email will look, as well as making sure that it’s active and ready to function, you can carry out a test.
5. Send a promotional code to participants who verify their email address
1. Create a new email and add a title that will enable you to identify it.
2. Choose the "On validating the email" email type.
3. Select "All participants" as recipients.
4. In the "From name" field, write the name of the sender that participants will see when receiving the email. Optionally, in the "Reply to" field you can type the sender's address, in case you want the users to be able to respond to the email.
Note: If you don't set up the sender's address, by default the email address will be no-reply@easypromosapp.com (for Basic and Premium promotions) and no-reply@cstmapp.com (for White Label promotions).
5.Write the email to inform participants that you are sending the promotional code that can be redeemed. Use the smart tag "Promotional code" {{user_promotional_code}} to show the promotional code. You can also use the smart tag "Prize" {{prize-summary}} which will be translated into a small block of text that will include the name of the prize, as well as the promotional code assigned to each participant.
6. Attach the instruction or any other document you wish to send.
7. By default, sending is activated as soon as the email is created. If you don’t wish for it to be activated yet, uncheck "Activate sending of this type of email".
8. Click on "Create" to generate the email.
9. Review the general options to configure the signature of the email, as well as the header and footer images.
10. If you’d like to see how the email will look, as well as making sure that it’s active and ready to function, you can carry out a test.
6. Send a coupon to participants who refer and recruit friends
1. In "Description" add a text to identify this emailing.
2. Create a new email and choose the email type. It could be "By specific date" or "Manual" depending on your preference. You can also send it to a participant when they reach a minimum of recruits. This can be done via the "On recruiting a new user" option.
3. Select "Number of recruited users" as recipients.
4. Choose the conditions and values that determine which recruiting users will receive the coupon. Add the filter with the green button.
5. In the "From name" field, write the name of the sender that participants will see when receiving the email. Optionally, in the "Reply to" field you can type the sender's address, in case you want the users to be able to respond to the email.
Note: If you don't set up the sender's address, by default the email address will be no-reply@easypromosapp.com (for Basic and Premium promotions) and no-reply@cstmapp.com (for White Label promotions).
6. Write an email informing the recipient that you are attaching a coupon along with instructions for its use. Utilize the "smart tags" to customize the email.
7. Attach the coupon.
8. Click on "add" to generate the email.
9. Review the general options to configure the signature of the email, along with the header and footer images.
10. If you’d like to see how the email will look, as well as making sure that it’s active and ready to function, you can carry out a test.
7. Send a coupon to participants that have successfully answered the quiz
1. Create a new email and give it a title that will enable you to identify it.
2. Choose the email type, “On participating.”
3. Select “Quiz results” as recipients.
Note: This option will only be available if you have created a quiz with final messages. The filters and values are identified with those you set up in the “final messages” section of the questionnaires editor.
4. Choose the result value. Participants who obtained this result will receive this email. Add this filter created with the green button.
5. In the "From name" field, write the name of the sender that participants will see when receiving the email. Optionally, in the "Reply to" field you can type the sender's address, in case you want the users to be able to respond to the email.
Note: If you don't set up the sender's address, by default the email address will be no-reply@easypromosapp.com (for Basic and Premium promotions) and no-reply@cstmapp.com (for White Label promotions).
6. Write the email, informing the recipient that you are sending a coupon. Include instructions for its use. Utilize “smart tags” to customize the email.
7. Attach the coupon.
8. By default, sending is activated as soon as the email is created. If you don’t wish for it to be activated yet, uncheck “Activate sending of this type of email.”
9. Click on "create" to generate the email.
10. Review general options for setting up the email signature plus header and footer images.
11. If you’d like to see how the email will look, as well as making sure that it’s active and ready to function, you can carry out a test.
8. Send a coupon to Instant Win winners
1. Create a new email and add a title that will enable you to identify it.
2. Choose the “On participating” type of email.
3. On "Recipients" apply the filter "Prizes" and on "Values for conditions" choose which winners you wish to email according to the prize awarded and add this filter with the green button.
4. In the "From name" field, write the name of the sender that participants will see when receiving the email. Optionally, in the "Reply to" field you can type the sender's address, in case you want the users to be able to respond to the email.
Note: If you don't set up the sender's address, by default the email address will be no-reply@easypromosapp.com (for Basic and Premium promotions) and no-reply@cstmapp.com (for White Label promotions).
5. Write the email informing the recipient that you are attaching a coupon along with instructions for use. Utilize the “smart tags” to customize the email.
6. Attach the coupon.
7. By default, sending is activated as soon as the email is created. If you don’t wish for it to be activated yet, uncheck “Activate sending of this type of email.”
8. Click on "add" to generate the email.
9. Review the general options to configure the signature of the email, along with the header and footer images.
10. If you’d like to see how the email will look, as well as making sure that it’s active and ready to function, you can carry out a test.
Note: the values shown for the "Prizes" filter correspond to the prizes that have been created from the Editor> General> Prizes section.
Other emails:
1. How to create a double opt-in confirmation email
If you have created an opt-in check-box in the entry form of your promotion, you have the possibility to send an automatic email with a confirmation link that the user has to click to confirm the double opt-in.
Follow the instructions below to configure this option:
1. Access the promotion management page and click on "Editor."
2. Go to Pages > Entry form > Form fields and make sure that the opt-in checkbox you have added has the option "Double confirmation via email" checked.
3. Click on "Edit email":
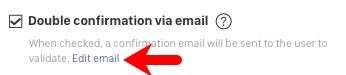
4. This option will automatically generate an email preconfigured to request that the user confirms that he has checked the opt-in check-box in the entry form. The settings of this confirmation email will open in a new browser tab.
Here we explain the different options that you can customize:
- Type of email: This option is preconfigured and cannot be changed because the email has been created specifically to be sent as soon as the user signs up.
- From name: Enter the company or brand name, or the name of the promotion.
- Subject: Finish customizing the email title that users will see in their email inbox.
- Body: Finish configuring the confirmation message. The default message already comes with the smart tag to generate the double opt-in confirmation link.
- Attach documents if you need to.
5. Click on the "Update" button to save the changes.
Comments
0 comments
Please sign in to leave a comment.